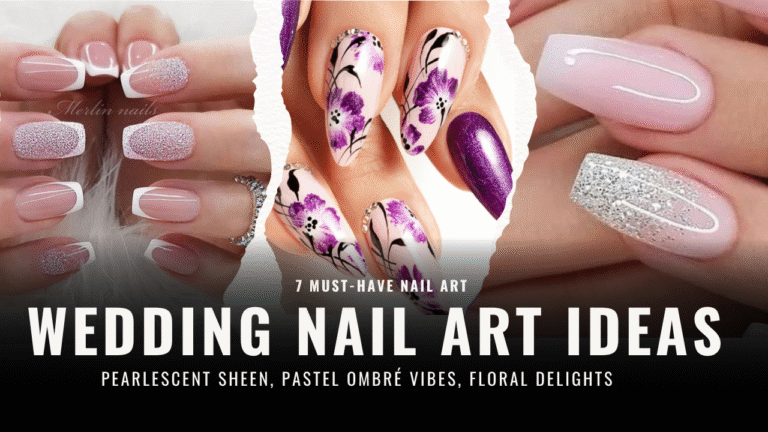
From Sketchbook to Salon: Creating a Custom Nail Design from Scratch
Nail art is more than just polish on your fingertips—it’s a canvas for self-expression, creativity, and style. Whether you’re sketching ideas in a notebook or bringing a bold design to life in a salon, creating a custom nail design from scratch is an exciting journey.
This article will walk you through the process, from brainstorming ideas to flaunting your unique nail art. Let’s dive into the world of custom nail designs and turn your vision into reality!
Why Create a Custom Nail Design?
A custom nail design lets you showcase your personality and stand out from the crowd. Unlike pre-made decals or standard polish colors, a bespoke design is tailored to your vibe, occasion, or aesthetic. Here’s why it’s worth the effort:
- Uniqueness: Your nails become a one-of-a-kind masterpiece.
- Personal Expression: Reflect your style, from minimalist chic to vibrant and bold.
- Memorable Moments: Perfect for events like weddings, holidays, or just because!
- Creative Freedom: Experiment with colors, patterns, and textures that speak to you.
Ready to get started? Let’s break down the process step by step.
Step 1: Find Inspiration for Your Nail Art
Every great nail design begins with a spark of inspiration. Your ideas can come from anywhere—fashion, nature, art, or even your favorite Pinterest board. Here’s how to kickstart your creative process:
- Explore Trends: Browse Instagram, Pinterest, or TikTok for trending nail art ideas. Look for designs like marble effects, geometric patterns, or floral motifs.
- Consider the Occasion: Are you designing for a wedding, a festival, or everyday wear? Match the vibe to the event.
- Draw from Your Style: Think about your favorite colors, patterns, or accessories. Do you love bold neons or soft pastels? Are you into glitter or matte finishes?
- Look Around You: Nature (think sunset hues or leaf patterns), fabrics, or even architecture can inspire unique designs.
Pro Tip: Create a mood board with images, color swatches, and textures to visualize your concept. Apps like Canva or Pinterest make this super easy!
Step 2: Sketch Your Nail Design
Once you’ve gathered inspiration, it’s time to put pen to paper. Sketching your nail design helps you refine your ideas before heading to the salon. Here’s how to do it:
- Grab a Sketchbook: Use a notebook or a digital drawing app like Procreate to sketch your ideas.
- Start Simple: Draw the shape of a nail (an oval or square will do) and experiment with patterns, lines, or shapes.
- Play with Elements: Try combining elements like:
- Lines and Shapes: Think stripes, dots, or chevrons.
- Textures: Experiment with glitter, chrome, or matte effects.
- Accents: Add rhinestones, studs, or tiny decals for flair.
- Test Color Combos: Use colored pencils or digital tools to see how shades work together. For example, a soft pink base with gold accents screams elegance.
Example: Want a celestial vibe? Sketch a navy base with tiny white stars and a crescent moon on one accent nail.
Don’t worry if you’re not an artist—simple sketches are enough to communicate your vision to a nail technician.
Step 3: Choose the Right Materials and Techniques
Your design will come to life with the right nail products and techniques. Work with your nail technician to select materials that suit your vision and ensure long-lasting results. Here’s what to consider:
- Nail Polish Types:
- Regular Polish: Affordable and versatile but may chip faster.
- Gel Polish: Durable, glossy, and perfect for intricate designs (lasts 2-3 weeks).
- Acrylic or Dip Powder: Ideal for longer nails or 3D elements.
- Tools for Detail:
- Dotting tools for perfect polka dots.
- Thin brushes for fine lines or intricate patterns.
- Stamping kits for consistent shapes like flowers or stars.
- Embellishments: Rhinestones, foil, or charms can elevate your design but ensure they’re securely applied.
- Base and Top Coats: A quality base coat protects your nails, while a top coat seals the design for shine and durability.
Pro Tip: Discuss your lifestyle with your technician. If you’re constantly typing or washing dishes, opt for gel polish or a sturdy top coat to prevent chipping.
Step 4: Collaborate with Your Nail Technician
A skilled nail technician is your partner in bringing your sketch to life. Here’s how to ensure a smooth collaboration:
- Bring Your Sketch: Show your mood board or sketch to clearly communicate your idea.
- Be Open to Suggestions: Technicians know what works best for nail shapes, lengths, and durability. They might suggest tweaks to make your design pop.
- Discuss Nail Health: Ensure your nails are healthy enough for the design. Weak or brittle nails may need a simpler approach or strengthening treatments.
- Set a Budget: Custom designs with embellishments or intricate details can get pricey. Clarify costs upfront.
Example: If your sketch includes tiny hand-painted flowers, your technician might suggest using decals for precision if time or budget is tight.
Step 5: Care for Your Custom Nail Design
Once your nails are done, proper care keeps them looking salon-fresh. Follow these tips to maintain your custom nail art:
- Moisturize Daily: Apply cuticle oil to keep your nails and skin hydrated.
- Wear Gloves: Protect your nails when doing dishes or cleaning to prevent chipping.
- Avoid Picking: Resist the urge to peel off polish or embellishments—it can damage your nails.
- Schedule Touch-Ups: Gel designs typically last 2-3 weeks. Book a follow-up appointment to refresh or remove the design safely.
Pro Tip: Take photos of your nails right after the appointment to share on social media or save for future inspiration!
Step 6: Show Off Your Nail Art!
Your custom nail design is a work of art, so don’t be shy about flaunting it! Snap some pics in natural light to capture the colors and details. Share your creation on Instagram or Pinterest to inspire others. You can also ask your nail technician to feature your design on their portfolio (with your permission, of course).
Common Mistakes to Avoid
Creating a custom nail design is fun, but there are a few pitfalls to watch out for:
- Overcomplicating the Design: Too many elements can look cluttered on small nails.
- Ignoring Nail Shape: Designs that work on long stiletto nails may not suit short square ones.
- Skipping Prep: Healthy nails are key. Don’t skip cuticle care or base coats.
- Rushing the Process: Intricate designs take time, so be patient with your technician.
Conclusion: Unleash Your Inner Nail Artist
From a simple sketch to a stunning salon masterpiece, creating a custom nail design is all about letting your creativity shine. Start with inspiration, sketch your ideas, collaborate with a skilled technician, and care for your nails to keep them looking fabulous. Whether you’re rocking a minimalist look or a bold, bedazzled design, your nails are a reflection of you. So grab that sketchbook, dream big, and let your fingertips tell your story!
What’s your next nail design idea? Head to your favorite salon or start sketching today—your nails are waiting to shine!


